Sunday, January 31, 2010

CHA Winter 2010 Anaheim Donna Salazar New Line & Giveaway!


Hi Everyone,
CHA is a great time to reconnect w/friends and catch up. I had a great time catching up with Donna and her great new line being released this CHA.
I've always luv her style in the shabby vintagey feel.
Last year I had the pleasure to work with Donna's first line released  for Christmas.
Here's a card I created that went into the Girlfriend club book.


Donna has created this new distressing tool  for Zutter International


some of her new line.


Donna has graciously given me some items for a giveaway!
Want to be the first to work with Donna new line????

All you have to do is leave a comment and follow 
this blog to win!

Visit Donna's site HERE


Have a great day,
Maggie

Share/Bookmark

Friday, January 29, 2010

CHA Winter 2010 Anaheim California!

Hi Everyone,
Here is a recap of CHA Winter.

I left Orlando on Thursday to work at the Provo Craft booth.

We were debuting the Cricut Cake expression machine along with a lot of new folders for Cuttlebug.
The Consumer show wasn't as busy as the one in Orlando.
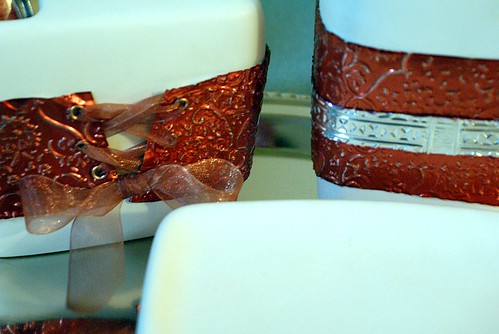
Provo Craft came out with an amazing set of folders that cut emboss and stencil all at once.

If you have use nestabilities you know how hard it is to line them after cutting, with the Emboss plus from Provo craft the guess work is gone, with one pass in the machine it emboss, cut, deboss.

Now the fun part  is a little flap when you lift it you can use your chalk, glitter, glitter mist or anything else you desire.
Since I sign a confidentiality agreement I couldn't talk about the folders, or the Cricut Cake Machine either :)


For the next few days I will showcase some of the fun stuff we did. Here's a pic of my friend Beverly showcasing Zutter Products.


On My way to Anaheim on the plane to my left and right there were guys both coughing their head off, at that point I felt I was going to get sick, by the time I got to the Hotel, I started sneezing, I knew right then. I had caught whatever they had.

By 10 oclock my eyes were watery and my head felt like a watermelon.. Then I went to search for a CVS to get cold medicine there were nothing close by.

The next morning I felt like a truck went over me..Unfortunately I had to get up and get the samples the designers from Cuttlebug Challenge had created set up in the booth. I was sneezing so badly that Director of Product Development Bevan told me to go back to the hotel and rest..

I felt so bad having to leave them, since it was the three of us manning the booth. I went back to the Hotel lay down for 2 hours and then headed back to the Convention to answer questions and showcase the new products.
Jim the CEO of Provo Craft heard that I refused to spend the day in the Hotel came over thank me  and told me I must go back to lay down so I don't get anyone else sick.. wasn't that sweet of him???
Then Mike told me I must rest so I get better for the Trade show..


Here is a pic of the two of us and also of Cricut..


Oh yeah we all had to wear the Cricut Chef outfit for the debut of the Cricut Cake..and the hat, but
I didn't wear the hat for the rest of the show, I end up giving mine up since we ran out..
Come back tomorrow for more updates..
TFL
Maggie
Share/Bookmark

Wednesday, January 20, 2010

CHA Winter 2010 in California and Provo Craft!

Hi Everyone,


I am  thrilled and honored to be invited once again to be part of the festivities at CHA this winter 2010..
Last year the Cuttlebug Challenge blog was the first challenge blog to be invited to CHA, we were beyond honored, we floated on cloud 9 for months afterwards.LOL

I will be at CHA at the Provo Craft booth from Friday to Thursday next week. I will be doing demos at 10 Am, 3PM.
Please stop by booth #955 and say hello, if you are going to be at CHA? I am looking forward to meeting all of you and thanking you personally for your continuing support.


We want to thank our sponsors, Prima, Cosmo Cricket, 10 second studios, Bella Bldv, Adornit , Our Daily Bread Designs Stamp, Basic Grey for their continuing support, as we display awesome samples for them at CHA!

Here are some sneak peaks! 


Come back later as I showcase more sneak peak from 10n second studios.
Maggie

Share/Bookmark

Friday, January 15, 2010

Valentines with the Silhouette

With Valentine's Day a month away, I have started on ideas for my daughter to hand out to her class. I love making little goodies for the children and since she only has 30 children in the entire school (K-5) it usually doesn't take me too long. This year I am going to be filling a bag with Valentines themed items instead of candy…well maybe just a bit of candy.


I love how the Silhouette has many 3D designs for bags, boxes, even a milk carton. I chose a really cute bag you can find it in the downloads under "adorable_box_C00267_20509"


This bag is super easy to fold since all the score lines are cut for you. I used nice heavy cardstock so that it was very sturdy.


The printed images on the bag and the container are a digi kit from Two Peas by Rhonna Farrer called "Valentines Gift Packaging Kit". I changed the image I wanted to use into a jpeg file, imported it into my ROBO Master software for the Silhouette and then created an outline so it would cut the images out for me. No more fussy cutting! I have a tutorial on my blog if you would like more detailed directions.

I used stickles for the glittered edges to make it sparkle and finished it out with a little bow. Now I can start filling it up with goodies.


This little candy dish is made from a petri dish, the ones we used to use in biology! I used the same digital elements as the bag, just increased the size. I wrapped a ribbon around the dish and added a cute bow and it was ready to give away!

I can't wait to see what you are making for your Valentines. Be sure to leave a comment with a link to your creations!

Have a great weekend.

**Teresa**


Share/Bookmark

Friday, January 8, 2010

Creating 3D Flowers using your Silhouette


(Layout inspired by Scrapbook Challenge’s Blog Hop Challenge Sketch.)


Happy Friday! My name is Teresa Hord and I am a Contributor for Cutting Above!


I love all things floral and frilly so my layouts usually have some kind of flower on them. I try to keep a well stocked scraproom however, I always run into the problem of not having just the right color flowers for my layouts. I have recently started making my own flowers with the help of my **ADORED** Silhouette SD.


The materials I used for this project are:
My Mind’s Eye: Coastal “Authentic” Patterned Paper, Journaling Square and Rub-Ons, CTMH Twine, Bazzill Cardstock, Ranger: Baby Blue Stickles, Silhouette SD, and bulk ribbon.

Start with the 3D Posy Flower from the Silhouette Online Store.

1. Adjust the size to the diameter you want for your flowers.
2. “Ungroup” the so you can cut each layer out in a different paper. One of the layers I used Baby Blue Stickles by Ranger to make them sparkle like the patterned paper I used for the layout.
3. Stack and glue each layer in the middle section.
4. Use a craft button with some twine for the middle.
5. Fold the layers up around the craft button to create a 3D effect.


Now my flowers match my layout perfectly!


(Layout inspired by Scrapbook Challenge’s Blog Hop Challenge Sketch.)


Be sure to come back and leave a comment with a link to the flowers you have created!
Let us know what you think?
Have a fabulous day,
Teresa

Share/Bookmark

Thursday, January 7, 2010

Sweet Treat Thursdays

Hi Everyone,
Have you heard the news? Cuttlebug Challenge
introduce Sweet Treat thursday, where they feature, Cricut, Gypsy, Your Story and Yudu Inspirations..

Head over to the Cuttlebug Challenge blog for the giveaway of Everyday paper doll cart and Simply Sweet..

It's with pleasure we welcome our guest blogger Carla, and a member of the team..visit her blog


Me-4carla


Please leave a comment to welcome Carla :)


Cuttlebug Challenge blog!! I hope you're all ready to dust off your Cricuts and create a gorgeous Valentines Day set for someone special in your life 'cause I have the *cutest* projects & card to share with you!!

Let's get the show on the road shall we?

For my projects I used the following materials:

Cricut Expression Doodlecharms Cartridge Basic Grey Bittersweet collection kit (stickers, etc) My Crafts ribbon & roses (from the $ store if you can believe it!!) Fancy Pants Stick Pin Doodlebug Sugared Cardstock Prima Leaves Making Memories Stickers (alpha & sentiment) KaiserCraft Rhinestones EK Success Mini Retro Flower Punch

Here are my creations! And i'd like to mention that this gift set can be made with supplies you have at home a few items from the $ store! I bought the huge lollipop, ribbon, roses, and big heart sucker from the dollar store, so for under $5.00 you can create a gorgeous gift!!


To create the jar cover:


1. Cut patterned paper to wrap around jar, punch edges with border punch. 2. Cut contrasting patterned paper to wrap around jar, adhere. 3. Cut scallop heart & heart from Doodlecharms Cartridge, adhere to band & adhere sentiment. 4. Cut white cardstock to fit lid, trim patterned paper to fit over white cardstock, adhere to lid. 5. Adhere roses & paper leaves to lid, tie ribbon in a bow around lid & insert stick pin.


To create the lollipop cover:


1. Cut scallop heart & heart from Doodlecharms cartridge to fit lollipop size.

2. Cut bug from Doodlecharms cartridge and punch heart, adhere to bugs back. Adhere to heart front. 3. Adhere roses and chipboard swirl to lollipop cover.

To create the card:


1. Cut card base to 4.25 x 5.5. Layer with scallop cardstock. 2. Adhere another layer of polka dot paper.

3. Cut bug border from Doodlebug Cartridge to length of 5.5". 4. Cut bug backs from Doodlebug Cartridge out of patterned paper. 5. Punch hearts & adhere to bugs, & rhinestones for eyes.

I hope you enjoyed my projects & they inspire you to create your own!! Be sure to come back and link us up so we can take a peek at your creations!

PS Giveaway on the Cuttlebug Challenge  giving away 2 cartridges :) More info here

Have a fabulous day,

Maggie


Share/Bookmark

Tuesday, January 5, 2010

A huge wild Thank you Card!


Hi Everyone,
A huge thank you for the luvly comments you have left for the drawing of the From My kitchen Cartridge donated by Provo Craft.
The Drawing will take place on the 6th so the more comments you leave, on this week post  the more chances you have :) kewl eh?
Ok The gifts have been opened, ooh ahh over them, the kids are over the moon…..now is the time to create your Thank You cards, I know it seems such a shore, but it doesn’t have to be, why…
The fabulous Wild card cartridge make it so easy to create simple cards..
Here’s a simple Thank You card!


The Journey:

Cut the envelope first so it fits the card, Ink the edges of the envelope, set aside.
Cut the card and ink the edges, add Mambi rhinestones to each section of the scallop.
Cut 4 scallop from Storybook cartridges in ascending sizes ink the edges and spray with glimmer mist, crumple while wet.
Add a button, floss and adhere to the center of the card,
Voila done in less than 15 mtes you have a beautiful simple card.. What could be easier eh?


The Cast:
 Mambi Rhinestone, Uhu Glue, Making Memories papers, Glimmer Mist, Foofala button, floss, Colorbok fluid chalk, Storybook and wild card cartridge from Provo Craft.
Have a fabulous day,
PS don’t forget to leave comments to be in the drawing for the From my kitchen cart :)
Maggie

Share/Bookmark