Showing posts with label Provo Craft Gypsy. Show all posts

Monday, November 29, 2010

Want2scrap Blog Hop and a fun Tutorial!

Hi everyone,
I am finally doing much better, thank you so much for all the good wishes. We welcome all of you to our first blog hop with Want2scrap.com
Want2Scrap Scrapbook Manufacturer is proudly sponsoring the Passionately Artistic blog hop! Let me tell you, the line of rhinestone bling and embellishments they currently have is fabulous.  Seriously! If you just can't stop yourself from putting bling on anything that doesn't move, you need to go visit them.  Want to know the best part??  Their prices are really great too.
I’m so happy that you are hopping with us, and leaving fantastic comments for us, with a chance to win fantastic prizes and 2 GIFT CERTIFICATES worth $25.00 plus other goodies.

xmasmagicwant2scrap-REVm
Here are just a few things to remember...
    • Become a follower of  Passionately Artistic and Want2Scrap blogs if you are not already, leaving comments on both sites for all 12 days of Christmas posting for a chance to win.
    • Leave as many comments as you wish, blog about it, tell your friends on twitter, facebook.
    •                                     not one but 2 fantastic prizes.
    • Leave a comment for each designer on the list to be eligible for the grand prize.  Did I mention that there will be two winners of the grand prize??  Yes that’s right.  One winner will be announced on the Passionately Artistic blog and the other winner will be announced on the Want2Scrap blog. On December 18th.
    There will be random prizes to all those who stop at every inspiration blog listed on the hop as well as wonderful sponsor prizes too! 
Here are the list of the ladies participating in the blog hop.
http://Passionatelyartistic.com
http://want2scrapco.blogspot.com/
Michele  http://inspireyourcreativity.blogspot.com/
Sandee   http://simplysouthernsandee.blogspot.com
Maggie   http://MaggieLamarre.com
Terrie     http://terriebaileys.blogspot.com/
Tracy     http://thelittlebluehouseblog.blogspot.com/
Ellen       http://closeyourears.blogspot.com/
Melissa   http://www.instampingmode.com/
Mimi       http://mycharmingblog-scrappermimi.blogspot.com/
Dana       http://paperdaydream.blogspot.com/
Court      http://courtscrafts.blogspot.com/
Melissa   http://blog.melissasamuels.net/

Our tradition, is to wake up early like 2-3 am have breakfast, then share a cup of hot cocoa, yep in the middle of the heat in Florida we have hot chocolate :)

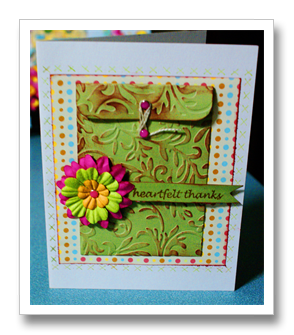
I want to share a simple tutorial on how to create a fantastic gift at a fraction of  the cost.
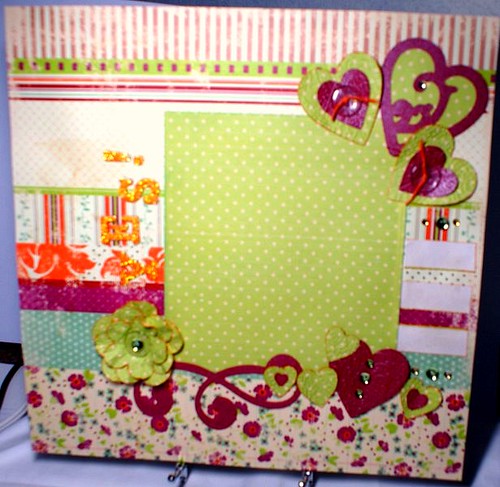
This Frame is sponsored by Marvy Uchida and Want2scrap.

SONY DSC
When the frame is open, you can see the back side of the front.
SONY DSC
Here is what you will need to recreate this project.
  1. Cut  10 flowers from Home Accent  Cricut  Cartridge sizes 4.5, 4, 3.75,3.5,3.25.2.75,2.5,2.25
  2. Ink all the edges.  Layer in ascending order to create the large flower, then fold the petals towards the center.
  3. Add a clear button to the center, add Want2Scrap bling.  Repeat the same process for the smaller flower.
  4. Add the Rhinestones under the petal to create a continuing line, I had to cut the Rhinestones to create the look I wanted which is what I luv about the Rhinestones the flexibility.
  5. Cut 2 leaves freehand and place on each side.
  6. Repeat the same process for the inside of the frame.
Supplies used:
  1. Marvy Uchida frame, Want2scrap bling.
  2. Cricut & Gypsy, Home Accent  Cricut  Cartridge.
  3. Core’dination Paper, Coloorbok fluid chalk, Blumenthal lansing buttons
Voila you are done.
I appreciate you leaving a comment and following this blog Smile
Have a fabulous day, don’t forget to visit the ladies to see their
If you would like to know about any of the steps, or if you have any questions let me know.  Be sure to leave a way for me to get back to you. Thank you so much!
Maggie


    Share/Bookmark

    Saturday, September 18, 2010

    Are you a Stampaholic?

    Hi Everyone,
    I am not really sure why once you become a crafter, you are also a collector, the more I have the more I collect.
    I am a stampaholic and very proud of it as well. I love stamps, from rubber,clear,and digital brushes also known as digital stamps..
    Do you ever wish you could find the itty bitty stamps that fit your needs when you are creating?
    Wish no more, Robyn aka the Pinkstamper has introduced a new line of itty bitty stamps sentiments to fit the bill. Whether you are a scrapbooker, or stamper these stamps will fit nicely in your collection..
    1. What makes those stamps different?
    They are made with the finest polymer. You can tell about the quality of the stamps in the details, they  are very sharp, and are carved high enough to create a very clean image.
    2.These stamps goes perfectly with several Provo Craft Cricut Cartridges, if you don’t use a Die cut machine that’s ok, the stamps are quite versatile.
    Here are a few cards I’ve created using several of the lines of stamps.

    Supplies used:
    Mypinkstamper line stamps, staz on, Provo Craft Cricut Cartridge Martha Stewart Elegant Cake, Cricut Expression machine, Coredination black magic and glitter paper, Colorbok fluid chalk,Mambi rhinestones, GCD Melody Ross pattern papers.


    I use the family & Friends line on this lay out, here are more details.

    Here are 3 cards I have created,


    Pros:
    The stamps are very well made, sharp details, they cling beautifully even after several washing, they don’t stain like other clear stamps on the market.
    The packaging instead of a sheet over the stamp, the overlay is like an envelope very easy to keep the stamps in one place..Each line has at least 25 sentiments, which is a bargain..

    Cons:
    Since this is a new company there is not a wide selection, Robyn will be coming out with more stamps.
    Would like to see even smaller sizes.

    You can see more of the stamps in action HERE for more inspiration..
    Here are the lines I worked with.

    FamilyandFriendsSmall PunnyliciousSmall
    SimplySweetOccasionsSmall

    We are offering you a great prize Robyn’s Dvd on how to create awesome projects.


    MPSdvdVol2

    How you can win:

    • Leave as many comments as you wish on all the post on this blog, from today till Sept 30th. 
    • Follow the blog and tell your friends about this giveaway.
    • Let me know which stamps set you like from here
         Winners will be announced on Oct 1st 2010

    Please remember: Help spread the word about this giveaway!


    Who is eligible:

    Everyone! You don’t have to be a blogger to win, just supply a valid e-mail address.

    When the giveaway ends:

    October 1st. I’ll e-mail the winner(s), and results are always posted here as well. If the winner doesn’t respond within seven business days, a new winner will be drawn.
    Have a great weekend, Don't forget to follow the blog and leave a comment..

    Maggie
    PS don't forget we are giving away 3 Cricut Cartridges (2 Home Decor) ( 1 Once Upon a Princess)Here
    $10.00 GC to William Sonoma Here


    Share/Bookmark

    Sunday, August 29, 2010

    Yes You can, This moment!

     I've been looking at some older carts and rediscovering the amazing possibilities that I've missed...
    How on earth could have missed those amazing swirls????

    I had no set rules on creating I just wanted to layer the heart with the filigree, once I started then I wanted to add more hearts to finish the look I wanted..

    I am challenging you to add dimension to your cuts by layering...


    Here's the recipe:

    Supplies:
    Provo Craft Cricut Expressions, Provo Craft Gypsy, Gypsy Font Cartridge, Home Accent ,Graphically Speaking Cartridge,Cuttlebug  Machine and folder Holly Ribbons,MM Pattern Papers, floss DMC,fast finish decoupage, 3in 1 beacon adhesive, Copic Markers, Mambi Rhinestones.

    Let's Cut:
     Cut 11 hearts in ascending order 4 inches, 3 inches, 2.5 inches, 2 inches, 1 inch. Embossed with Cuttlebug folder Holly Ribbons, apply fast finish decoupage
    Cut 2 swirls from Graphically Speaking, ink the edges with Copic Markers.

    Cut 3 flowers from
    Home Accent at 3.25, 2.75,2 inches, Embossed with Cuttlebug folder Holly Ribbons, apply fast finish decoupage, ink the edges with Copic Markers. Adhere the buttons with floss.
    Cut Frame from Gypsy Font, Ink the edges with Copic markers.

    Let's assemble:

    Adhere Frame onto pattern paper, to the center right, Adhere 3 hearts and filigree to the top right corner.
    Adhere Journaling Strip to the right of the frame.

    Tip Use the bottom white section of the paper for your Journaling.

    Adhere both swirls to the bottom of the frame and the hearts.
    Adhere the flower with brads in the center to the left of the swirls.

    Add title
    Voila you are Done!

    Maggie

    Here is the Layout again..


    Share/Bookmark