Wednesday, March 31, 2010
May not be too exciting...but I am pumped!
This blizzard was insane so I wanted to show several photos I took from inside the van as we drove. Some were in pitch black and others were under street lamps. I wanted to stay with my color theme so I used the same papers to back my photos as I used to cut u my letters. (Jasmine font.) I also wanted my center photo to pop a bit more so backed it differently than the others photos.
My writing is not the best but I wanted to make sure and journal a little bit. I drew pencil lines so I could wright straight and then used a great pen to write. I also went back to my headline for this page and just put a line on the right side of each letter. It makes the letters stand out a bit without cutting a shadow letter.
As I said, this is not a complicated layout but wanted you to see the use of smaller photos and my first attempt using the wonderful Cricut. Hope you have a wonderful and creative day.
Kristi
kristiscreativecafe.blogspot.com
Don't forget to become a follower of my blog for a chance to win a great prize package!
Tuesday, March 23, 2010
Happy Wednesday...a few hours early
Yes, I did bling out the envelope. I stamped the flourish and tore a bit of paper to make a rough edge. I used a paintbrush to apply a thin layer of glue then added glitter!
This was a quick, easy and fun card to make with a few supplies, on the go and with a bunch of kiddos on vaca! Nice the creative juices still work. Can't wait to get home and rest!
Happy Creating,
Kristi
Don't forget to become a follower of my blog for a chance to win a great prize package!
http://www.kristiscreativecafe.blogspot.com/
Happy Wednesday...a few hours early
Wednesday, March 17, 2010
A Work In Progress
I continued on sometimes stamping first and other times after. I then cut out some pears and ran them through the CuttleBug. I then ran the pastel colors over the tops of the deeply embossed images. I love my CuttleBug!!! I attached the pears with a dries clear glue.
I continued with the same process until I came to my last area. I cut out a larger pear and embossed it and I also stamped the "pears" stamp and tore it out. I added some final touches of pastel to make my embossed image pop a little more. I then painted the edges of the canvas with acrylic paint. I plan to embellish a bit more just not sure how or with what I am going to finish this piece off. It has been fun making this one! Hope you enjoy!
Happy Creating...Don't forget to visit my blog and take part in the contest!
kristiscreativecafe.blogspot.com Kristi
A Work In Progress
Wednesday, March 10, 2010
The Earth Laughs In Flowers
Love Craft Month! I did a card today. Next week I will be working on a different project! It will take me a while to complete it! I will have some before and after for that!
This card is a simple tri fold card. It measures 5 1/2 X 11. Finished card is 5 1/2 square.
I cut 2 - 5 x 5 pieces of decorative paper. I edged the piece to go on the inside of the card with ink and attached. I cut the other piece in half and ran each half through the Cuttle Bug with he paisley folder. I also cut out 7 corner pieces while I was using the machine.
I inked the now embossed card fronts and ran ink over the top of the design to make the images pop a little bit. I attached these pieces to the card having them meet in the middle.
I ran the corner pieces through my little sticker maker and attached one in each corner of the card front and two on the inside flaps of the card. I double stamped the words on the card front and then on a scrap stamped the outside phrase again and attached it.
I got out my fun sticker and attache a flower to the front and little flowers to the inside. The flower on the card front I filled in with clear liquid adhesive and sprinkled with glitter. I did the same on the edge of the the words on the card front.
As a final touch on the card front I added a couple of dimensional flowers attached with a brad to make the flower really pop. I then stamped the Thinking of You on the inside.
Hope you all enjoy this card and I look forward to my post next week!
Also...check out my blog kristiscreativecafe.blogspot.com for more of my cards and to view details for my contest!
Happy Creating...
Kristi
The Earth Laughs In Flowers
Monday, March 8, 2010
Target $spot and Cuttlebug who would have thunk?
Good Morning,
We excited to be celebrating National Craft Month with you. Everyday you will find great inspiration with the Wow factor..
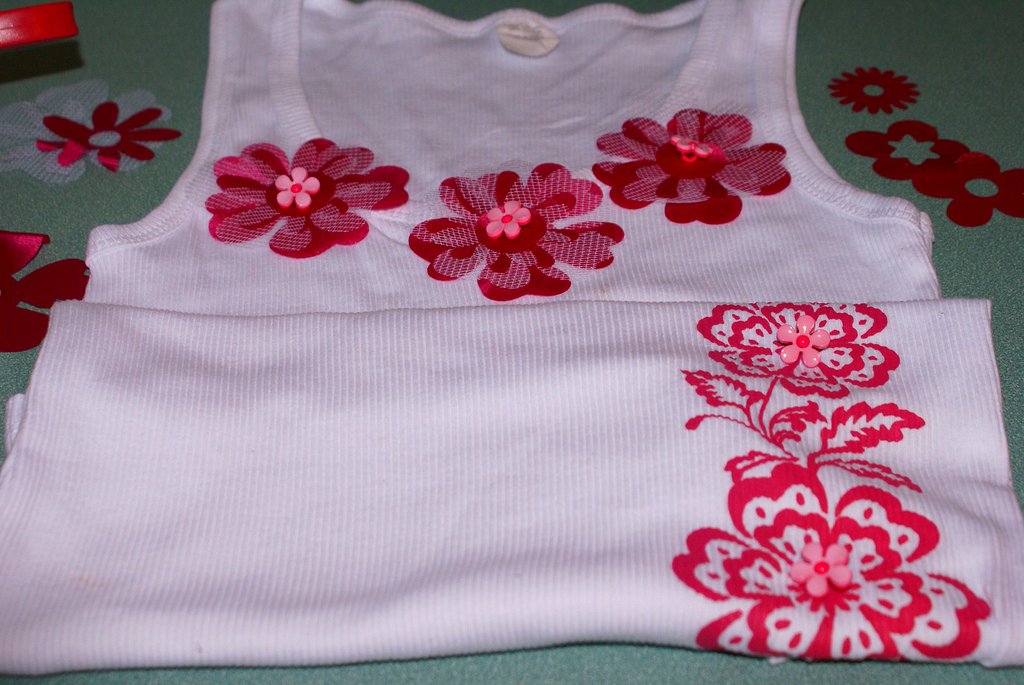
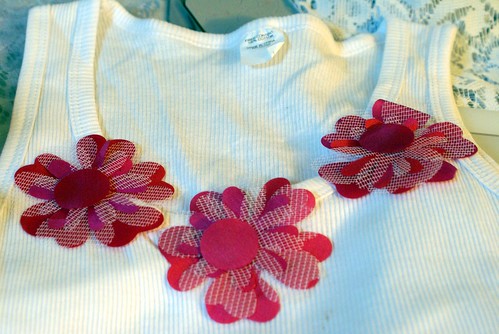
I'm Maggie with you to share a fun short tutorial on how to turn a T-shirt from the Target $ pot onto a wow T-shirt using the Cuttlebug and a few items..
How to:
1.Cut fabric strip to fit onto the Cuttlebug, repeat 3 times to create the layers.
Now it's time to assemble..
2.Layer the flowers
Target $spot and Cuttlebug who would have thunk?
Sunday, March 7, 2010
National Craft Month & Lamp Shade
Hi Everyone,
Welcome to a fantastic month of celebration from International Woman's Day, St Patrick's Day to our favorite ~ National Craft Month!
We plan on creating wonderful inspirations for you with a Wow Factor.
Today we are celebrating the gift of Light. Without light it is hard to create ART!
I’m Maggie with you today as I share a simple tutorial using the Cricut Expression, Provo Craft Gypsy, and Cuttlebug from Provo Craft
Supplies: Sassafras papers, terrifically tacky tape, glitter from Ek Success (MS), Zip Dry glue, Tattered Angels Glimmer Mist, Colorbok fluid chalk, Brads, Prima Say it in Studs.
How to:
1.Select the shadow on the Accent Essential Cartridge and size to 4 inches, multiply by 2, then down size to 3.5 inches, downsize again to 3 inches, downsize again to 2.5 inches for a total of 8 flowers.
2. Ink the edges, spritz the flowers with Tattered Angels Glimmer Mist, crumple and let dry for 2 minutes. The smaller flowers add glitter using the EK Success and MS fine gold glitter.
3.Unfurl the flowers a little bit, insert a brad into the center.
4. Use tacky tape and adhere the flowers to the lampshade, add Organza Ribbon for a finishing touch.
5. Adhere Prima Say it in Studs to the sides of the flowers, add the punch butterflies.
Voila, you are done!
Here is the finish Lampshade…wasn’t that easy, eh?
Thank you so much for stopping by and taking the time to leave a comment letting us know what you think?
National Craft Month & Lamp Shade
Saturday, March 6, 2010
Come chat with me & Kathy tonight!
You are invited to come chat with me(Maggie), Kathy and the team , as we want to get to know you much better, and have the opportunity to ask the team anything you want..
We will be announcing the winner tomorrow of the spot to Cropping with the stars and the Provo Craft Executive team.
Meet us here Saturday at 7PM EST.
http://www.ustream.tv/channel/cuttlebug-challenge-fabtv
Maggie
Come chat with me & Kathy tonight!
Wednesday, March 3, 2010
Thank You
Thank You