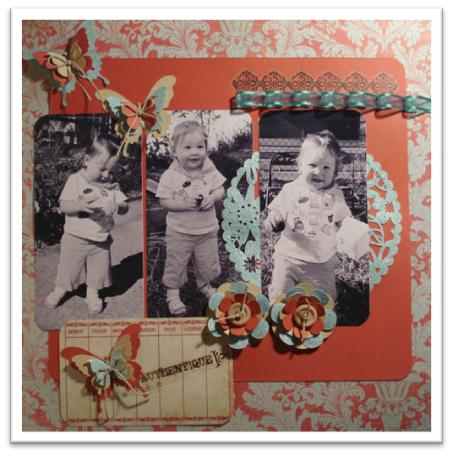
(Layout inspired by Scrapbook Challenge’s Blog Hop Challenge Sketch.)
Happy Friday! My name is Teresa Hord and I am a Contributor for Cutting Above!

I love all things floral and frilly so my layouts usually have some kind of flower on them. I try to keep a well stocked scraproom however, I always run into the problem of not having just the right color flowers for my layouts. I have recently started making my own flowers with the help of my **ADORED** Silhouette SD.

The materials I used for this project are:
My Mind’s Eye: Coastal “Authentic” Patterned Paper, Journaling Square and Rub-Ons, CTMH Twine, Bazzill Cardstock, Ranger: Baby Blue Stickles , Silhouette SD
 , and bulk ribbon.
Start with the 3D Posy Flower from the Silhouette Online Store.
My Mind’s Eye: Coastal “Authentic” Patterned Paper, Journaling Square and Rub-Ons, CTMH Twine, Bazzill Cardstock, Ranger: Baby Blue Stickles
Start with the 3D Posy Flower from the Silhouette Online Store.

1. Adjust the size to the diameter you want for your flowers.
2. “Ungroup” the so you can cut each layer out in a different paper. One of the layers I used Baby Blue Stickles by Ranger to make them sparkle like the patterned paper I used for the layout.
3. Stack and glue each layer in the middle section.
4. Use a craft button with some twine for the middle.
5. Fold the layers up around the craft button to create a 3D effect.
Now my flowers match my layout perfectly!

(Layout inspired by Scrapbook Challenge’s Blog Hop Challenge Sketch.)
Be sure to come back and leave a comment with a link to the flowers you have created!
Let us know what you think?
Have a fabulous day,
Teresa
Let us know what you think?
Have a fabulous day,
Teresa


5 comments:
LOVE your layout and sweet blossoms!! Very NICE indeed!!
Such a beautiful layout, love the flowers and how they coordinate with your butterflies.
Kim xXx
Such an adorable layout! Cute cute cute!
-Alyson
http://thescrapbookinglife.blogspot.com
thescrapbookinglife@gmail.com
I love it thanks for showing me another way to use my sill I love this thing
Wow, this is gorgeous! Love your flowers!
Post a Comment