Showing posts with label Cricut - Pink Journey. Show all posts

Sunday, September 5, 2010

Feathers, silk, & brooches!


Hi Everyone,
I've been wanting to clean up some flowers, I've had in my stash for a long time. Today I decided I was going to use some silk flowers and feathers to create brooches to match my wardrobe for Fall..
I've been watching the trend for Fall, orange big chunky accessories are in.

H & M has these large silk brooches starting at $9.99.
Here is an easy way to create yours for just $1.67..

Here is what you will need..
1.Large Silk Flowers
2.Feathers
3.Brooch pins
4.Fabric Glue (fabri-tac from Beacon Adhesive)

Let's start, rearrange the flower so it looks more bouffant, then use the fabric tac to adhere the petals.

 Cut 1 branch of feather in half then adhere to the back of the flower. Then add the brooch let it dry over night by using the Fabri-tac..


Here is the result!  this flower matches my shirt perfectly..


What do you think is it worth $1.67???? leave me a comment let me know what you think?

I challenge you to update your wardrobe with this simple accessory...

Have a fabulous day,

Maggie

PS.don't forget I am giving away not 1 but 3 Cricut Cartridges giveaway here
$10.00 Gift Certificate to William Sonoma  HERE

Share/Bookmark

Thursday, August 12, 2010

Visual learner? check these videos


Vidoes


Share/Bookmark

Friday, December 25, 2009

Prize Recap!

Hi Everyone,

Merry Christmas everyone :)

I hope you find it in your hart to forgive me for not being active on here, I plan on doing a better job coming this coming  New Year!

You will see we have a new format where we will showcase, stamping ideas, card making ideas,die cut ideas, and give a few prize here and there along the way :)

Here’s a recap of our winners, some of  them  have been notified and prizes have already been sent.

4x6 idea book winner is Christina,

Pink Journey Soneta

we have not heard from

okieladybugsscrapnmore who has won our blinkie patrol :)

alwayscharlie who has also won our blinkie patrol :)

Ladies please contact me at cuttingaboveblog@gmail.com so I can get your prizes out to you :)

Have a great Holiday,

God Bless!

Maggie


Share/Bookmark

Tuesday, October 27, 2009

Provo Craft Cricut Cartridge Review: From My Kitchen

Hi, it's Diane from the Design Team and today I am sharing my review of one of the newer Cricut cartridges "From My Kitchen."  I received this cartridge as a prize when my lampshade project was chosen for the Project Corner and Spotlight in the Cricut Chirp newsletter.

Carol already did a very helpful review that you can find HERE.  She also made a great project that you can find HERE.  So I will just be adding a few of my thoughts and ideas about the cartridge.


There are many images of kitchen appliances and tools all with a retro style.  I particularly like this apron and telephone.


The farm and other animals could be used on lots of projects that are not kitchen related.  I think the artwork is charming - just look at the turned up snout on that pig!


For those with a sweet tooth, there is a cupcake, a slice of cake and more cake!


There are two keypads full of pre-welded words - on their own and set into ovals.  Most of the words a quite specific to cooking...


...but with a little creativity, you can find ways to use them for other projects!  I added "'tis the" in the Gypsy Font in this screen shot.


The recipe cards are set up in two rows - the top row is proportioned for 3 x 5 cards and the bottom for 4 x 6 cards.  Just set your height at 3 or 4 and you will have perfectly sized cards for your recipe box each time you cut.  There are also recipe card dividers with tiny symbols sized to fit on the tabs.


By using some Design Studio magic you can even adapt a few of the recipe card designs to create A2 notecards.  This photo shows some cards that I made last month - here is a LINK to the post on my blog if you would like to read more about them.

When I first heard about this cartridge I thought it would be perfect for anyone making a recipe book or doing recipe page swaps with other scrapbookers.  It turns out to have many other uses as well.  I would like to try making a file box with all of the dividers to help organize the cards I have made but have not yet sent.

I tend to look at cartridges from a Design Studio perspective and like to see full cartridges where every feature set has a lot of variety.  The shadow keys for the words in ovals take up two full keypads which seems like too much since I could adapt any oval to shadow my words.  However, I had to step back and realize how convenient it is to have the exact size oval preset on the same key for the circled oval words when you are using the Cricut without a computer.

I think most Cricut users would enjoy this cartridge - particularly those that do a lot of cooking and recipe swaps.  Even if you are not much of a cook, there are plenty of other ways to use the images on the cartridge, so take a good look what this cartridge has to offer.


Don't forget Cutting Above is giving away the exclusive Pink Journey cartridge - just leave a comment to be eligible to win. HERE

Maggie adds:
Do you have this cartridge?
What do you think of it?
Here is where you can find  this cartridge at a very low price Hallmark Scrapbook


Share/Bookmark

Sunday, October 25, 2009

Design Studio - A Beginner's Guide

Hi, it's Diane from the Design Team.  I have been a Design Studio user for nearly two years and, for me, the Design Studio is an essential crafting tool when working with my Cricut(s)!  I will be doing a series of posts to help all of you who have not yet taken the plunge learn how to make the most of this incredible tool.
So let's start at the very beginning - for someone who has not even opened the box.  Many people are hesitant to get started but once you get going you may forget how to push the buttons on your machine.  It's time to get the software on your computer and start creating!


Inside the box you will find a CD in an envelope - the version of the software on that CD is almost certainly out of date but there is a very important sticker on the envelope with a series of six groups of numbers that you will need to activate your software and make it possible to cut designs with any cartridges that you have in your possession.


The sticker can be seen at the bottom of the envelope (the numbers have been blurred but there are six groups separated by dashes).  There were some copies of the software that were distributed with stickers that only have five groups of numbers.  If you have only five groups you will need to contact Customer Service to obtain a proper serial number.


Also in the box you will find a Quickstart Guide, a User Manual, a cute Cricut Mouse pad and a USB cable to connect your computer to your Cricut.  If you obtained your copy of Design Studio through a rebate program you may only have a serial number.  In this case you can use any USB cable with two ends that look like those in the photo - this is a common printer cable and you probably have one at home already.  The Quickstart Guide and the User Manual are available to download online - click on the name of each to go directly to these resources.

On more important link is to the Design Studio FAQ page on Cricut.com.  If you run into difficulties, some of your questions may be answered there but I believe that the page needs some updating.  For example, the latest version of the program works fine on Vista 64 bit computers (I am using it on my Vista 64 bit computer on a daily basis).


Once you have located your serial number, the next thing to do is to go to the Cricut.com to the Design Studio Page.  Click on the link marked with the arrow to download Design Studio updates.  If you are already registered and signed in on the Cricut.com site you will go directly to the page.


If you have not registered on the site before you will need to complete the simple registration process and sign in.  I highly recommend checking the site frequently - many important announcements can be found on the message board and there is a great community of helpful people who are experienced with the software and may be able to help when you have those "middle of the night" questions.


First you will need to download the up-to-date version of the program by clicking the link - this is the brand new October '09 update.  Once the program downloads, run the installer and follow the onscreen prompts to complete installation. Then open the program and enter your serial number to activate it.

OK - you are finally ready to start creating.  Read through the manual quickly and then watch the VIDEO on the Cricut.com site.  The video was made before some features were added to the software but it is an excellent explanation of "the basics."  In my next Design Studio post,  I will tell you about those additional features and how to use them.

Have fun exploring what this new tool can do for you! 

Don't forget Cutting Above is giving away the exclusive Pink Journey cartridge - just leave a comment to be eligible to win. HERE


(Edited for new update 10-28-09)

Share/Bookmark

Wednesday, October 21, 2009

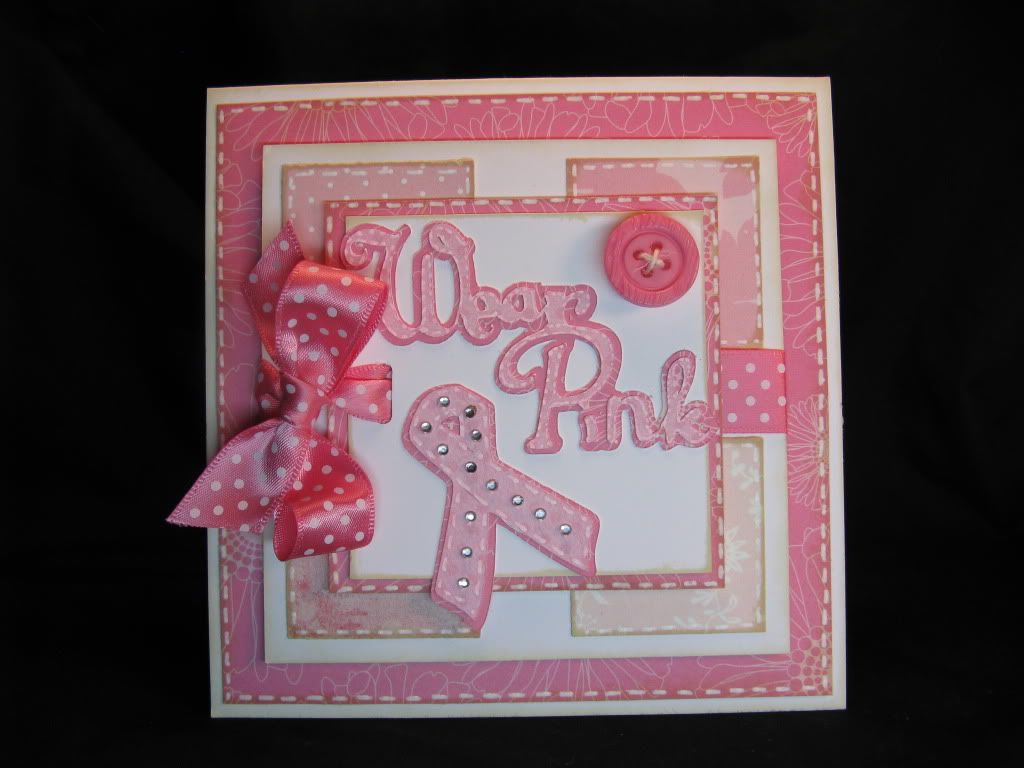
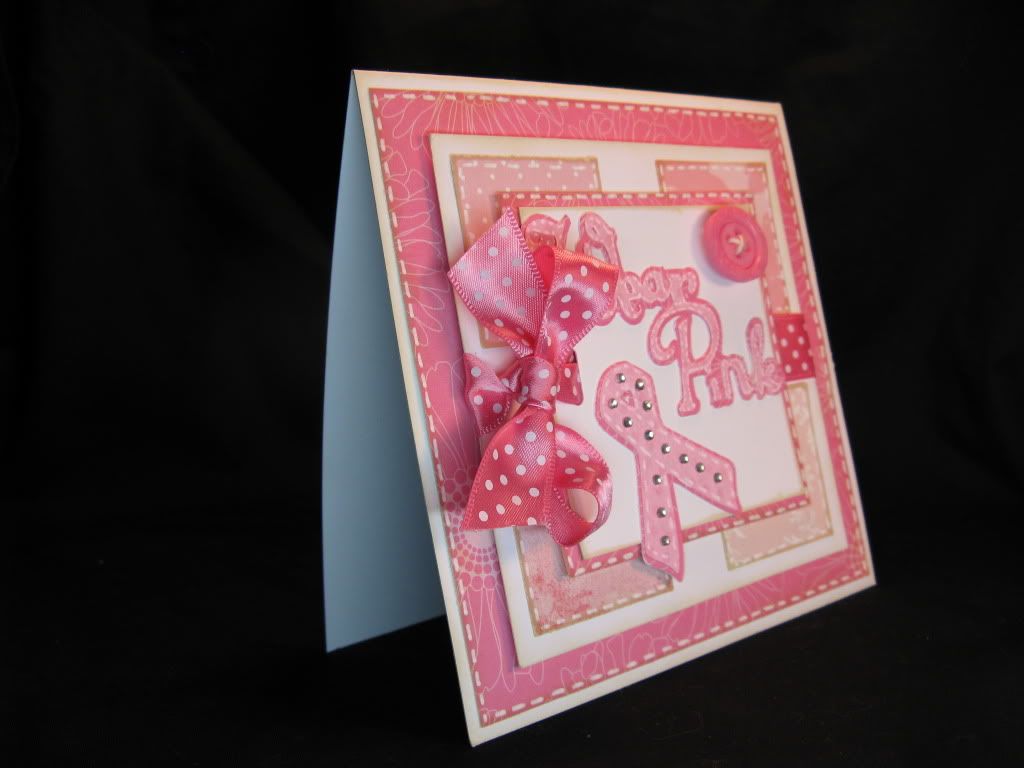
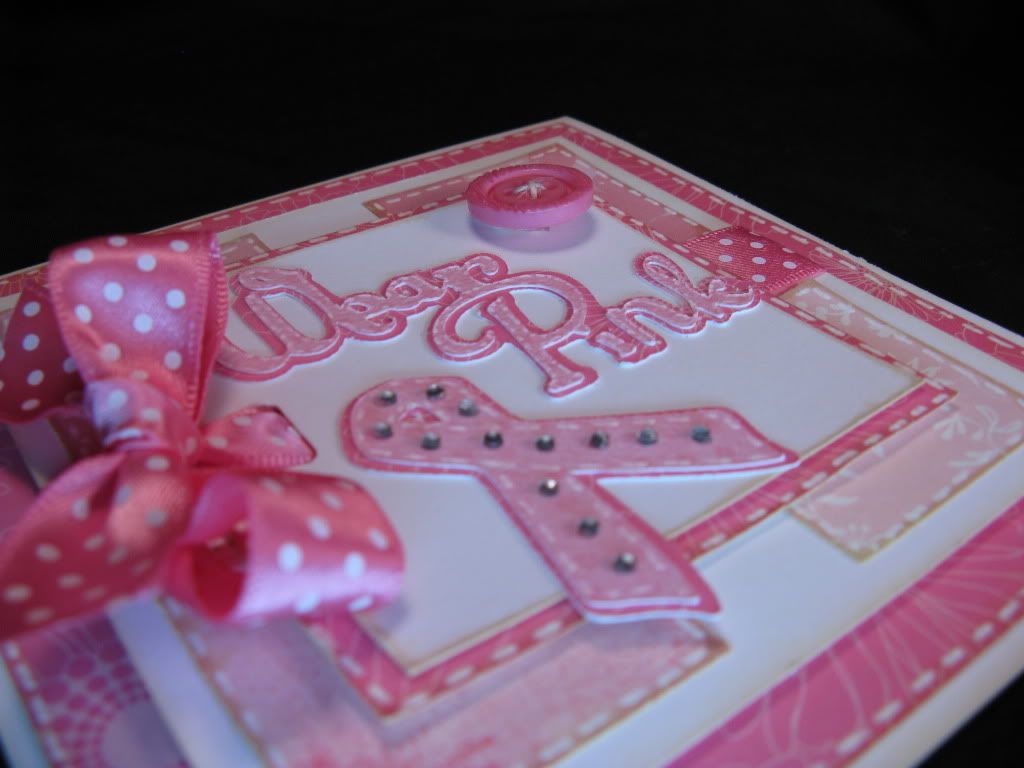
Simple Breast Cancer awareness card using Pink Journey!

Hello, everyone! I have a fairly simple card for you today using the Pink Journey Cricut cartridge. One of the reasons this card is so easy is because, I just rummaged through my scraps and pulled out all the pink patterned paper that I had. I knew I wanted my card to be mainly pink, but I wanted to add a little more interest by using mismatched pieces.


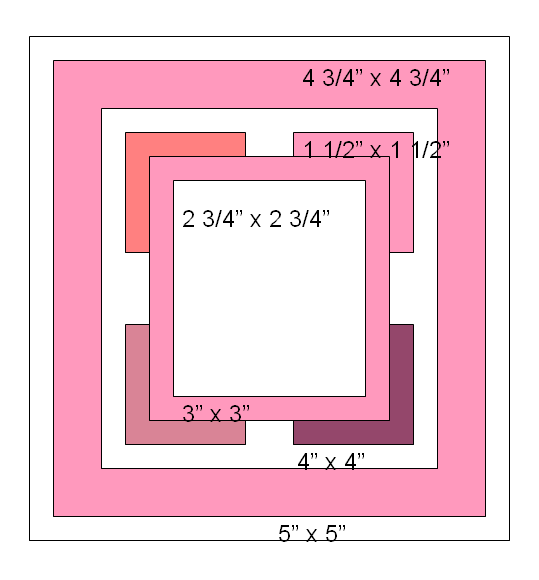
First I cut a 5" x 10" piece of white cardstock and scored it at the 5" mark. Then I adhered a 4 3/4" x 4 3/4" piece of pink paper on top of that. The third layer is a white piece cut at 4" x 4". A 1 1/2" punch was used to make the pink squares. The last two layers of paper are cut at 3" x 3" and 2 3/4" x 2 3/4".


I then pulled out my Pink Journey cartridge and cut the 'wear pink" and 'ribbon" at 1 3/4. I also cut the shadows for both and adhered the pieces together.

Stitching, ribbon, bling, and a button was added last for a final touch.


Here is the sketch to make duplication a snap!


Have a great day!!

Let us know what you think of this tutorial by leaving a comment?

Leave a comment on all the Pink Journey events for a chance to win the Pink Journey Cartridge.


Share/Bookmark

Sunday, October 18, 2009

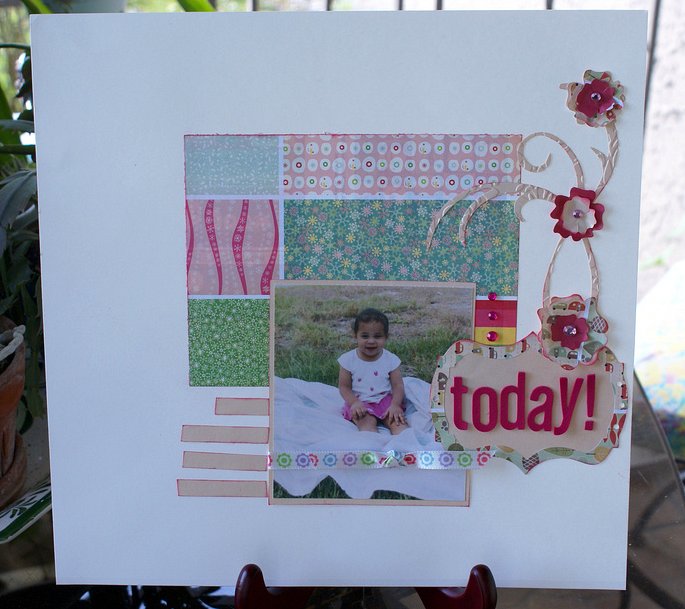
Love Today, Love Today!

Hi Everyone:
After reading all the notes for the Pink Journey Cartridge, I wanted to celebrate you, your strength and courage!
Your stories have touched all of us and wants to thank you for sharing them with us.

My boss gave me pics of her twins to scrap and have been procrastinating for a while, yeah :(.  After reading your stories I was inspired to scrap them, and honor all of you by using pink.

As I turned on music to get a little mood going. This song by Mika Love Today, Love Today had me so inspired. I have to warn you it's a catchy tune now it stuck in my head LOL..
I used the song  for my title. "TODAY"
I left plenty of space for her to journal....

Supply list:
Cosmo Cricket, Provo Craft Storybook, Cuttlebug Machine, Victoria Embossing folder, Sizzix die, K& Co gems, Color bok chalk


What catchy tune has inspired your lay outs or title?

Here's the video on you tube here

The month of October we are giving away the Pink Journey, leave a comment on each event for a chance to win.
Here's the first even here,  don't forget to sign up as a follower :)

Have a fantastic week,
maggie-sig
Share/Bookmark

Thursday, October 15, 2009

PINK JOURNEY: Cutting Magnet Material for a Pink Ribbon Magnet

 Hi Everyone!

The month of October we will be featuring Pink Journey in Honor of Breast Cancer month.
Leave a comment on this post and other events for a chance to win the Pink Journey Cartridge.


This is Tammy and I am excited to show you my Pink Ribbon Magnet project made with the
  PINK JOURNEY cricut cartridge.


I made these for some friends who are walking in the Susan G. Komen 3-day Walk for a Cure. It takes a special person to make that walk and I personally appreciate what they are doing! While this project is easy, it really helps to have some handy tips that will make the process even easier. I not only show you how to cut magnet material, but I demonstrate it with the 'baby bug' both using the Gypsy and not using the Gypsy. You will also learn how to use the TEMPLATE feature in the Gypsy (love that one!) .

I have broken it up into parts:

Part 1: How to layer vinyl on top of the magnet material without leaving air bubbles


Click HERE if you don't see the video.

Part 2: Using the Gypsy with the original Cricut


Click HERE if you don't see the video

Part 3: Using the TEMPLATE feature of the Gypsy to cut sentiments for ribbon magnet.


Click HERE if you don't see the video

I love this project. So simple to do, but so appreciated!


This is the one I made for my MIL, Edith. She was diagnosed with breast cancer a little over a year ago and is now a Breast Cancer Survivor! (love you mom!). 


Well, I hope that you found my post today inspiring. Like I said in the first video, there is a ribbon image located on the STAND & SALUTE cartridge if you do not own the PINK JOURNEY yet. And don't forget about all the other 'awareness' ribbons... each color can represent many different things, click HERE to see a listing of all the colors and their meanings.

Scrappingly yours,


Let us know what you think of this tutorial by leaving a comment?

Leave a comment on all the Pink Journey events for a chance to win the Pink Journey Cartridge.


Share/Bookmark

Wednesday, October 14, 2009

Win Win Pink Journey in our Month of October Events!

Hi Everyone,

ETA: Please leave your comments on the post featuring the the Pink Journey Cartridge. Example this Video here


Wanna Win Pink Journey?

Here's how you can win the Pink Journey cartridge:

1.Leave a comment on all the Pink Journey Events on this blog starting on October 15th for a chance to
   win the Pink Journey cartridge from Provo Craft.

2. Add our blinkie to your blog, tell your friends.

That's all how easy eh?

Winner will be Announced November 1st :)


Good Luck!
Thank you,
Maggie
Share/Bookmark