Monday, November 30, 2009

How to Crop Photos Using the Silhouette!

Something that I love to use on a layout is cropped photos, photos that have unusual crops are so interesting! Something amazing about the silhouette is that you can use your machine to do just this!!!

First as always open a new file.

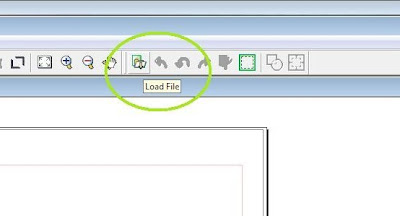
Next go to your upper toolbar and look for the import file button.

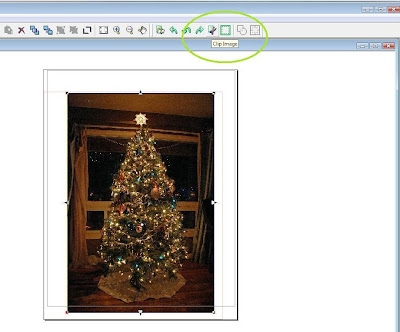
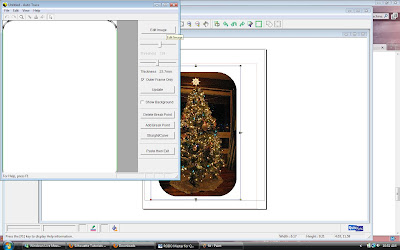
Next place your image. Note bigger files will take longer to load for an example I chose a jpeg file that is a photo of my Christmas tree this year after my kids decorated it. Edit size and placement, making sure to place image inside your cutting area.

Next in the same area of your toolbar there is a tab labeled "Clip Image" while your image is selected click on this tab. Next there will be a blue outline to your whole image rather than the editing arrows.

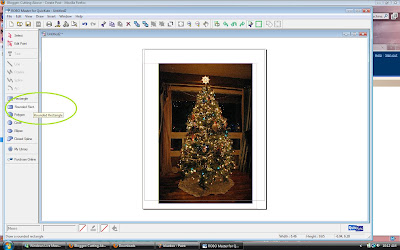
After you have clicked on "Clip Image" choose one of the closed line tools such as the rectangle or rounded rectangle on your left toolbar.

Click and drag a rectangle or circle around the whole image you want to crop.

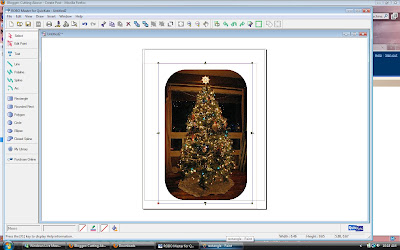
Click again to clip your image.


To get a super close crop use the closed spline tool on the left toolbar near the rounded rectangle.

Next select your image and press the "Get Outline" tab.

A new window will open up to edit your cut lines. Click on the "Outer Frame Only" box.


Click "Paste Then Exit" and your image will paste to the cutting area.

Deselect image and add registration marks by going up to the top toolbar clicking on edit then clicking on registration mark settings. Check the box that leaves the marks and press ok to place them.

Print out your image on your selected media, load media into Silhouette and press cut. Then your image will be cut they way you selected!
Share/Bookmark

Tuesday, November 24, 2009

Thanksgiving Layout using your cricut!

Hello. everyone! Today I have a Thanksgiving layout. I always find them difficult to do, but boy are they necessary for your scrapbook!


This double page layout is made mostly with core'dinations cardstock. I just love that stuff!


I used the Designer Calendar cricut cartridge to cut my title(pg. 51 in your handbook) cut at
4 1/2". The turkey is from the My Community cricut cartridge(pg. 32 in your handbook) cut at 3 3/4". I also sprayed the title with glimmer mist to give it a little bit extra.


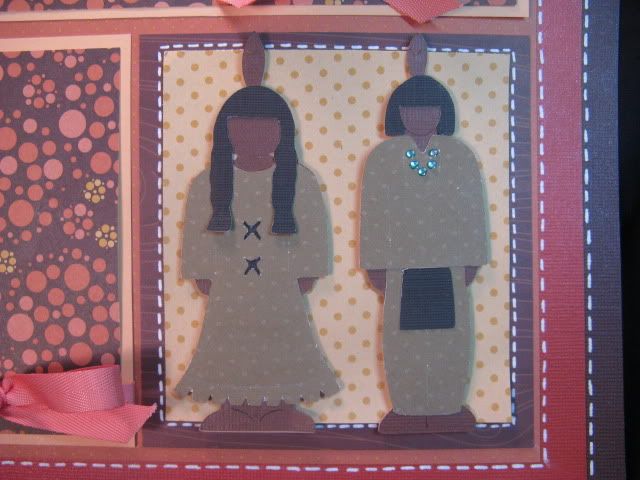
Those cute Pilgrims and Indians are from the My World cricut cartridge(pg. 31 in your handbook) cut at 4 1/4".


To get the turqoise look of the rhinestones, I colored clear rhinestones with a aqua colored copic marker. That is one of the good things about those markers! You can customize your embellishments!


Thank you so much for stopping by today! Have a safe and fun Thanksgiving!


Share/Bookmark

Sunday, November 22, 2009

Working With 3 Dimensional Shapes Using The Silhouette!

Today we will look at purchasing shapes online and working with a 3 dimensional shape that can be downloaded from the online store.

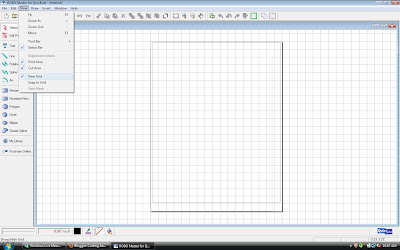
First as always open a new file go up to "View" and click on "View Grid"

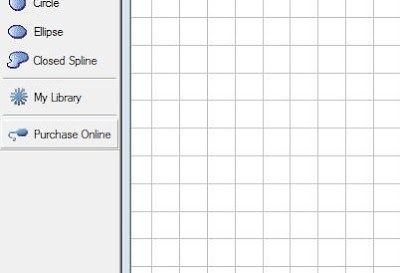
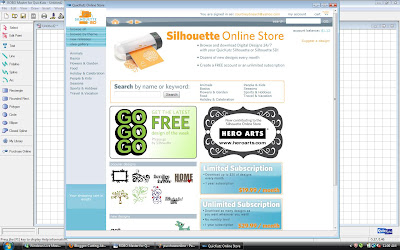
Next, on the left hand column there is a tab that says "Purchase Online" and has a little computer mouse icon next to it. Click that tab and wait for the online store to load.

When your store uploads this is what your page will look like.

Here you can browse all sorts of shapes. For this tutorial I entered the word "Boxes" into the search box. Download the "Icicle Box" after you purchase and check out it will take a few minutes for you shape to download.

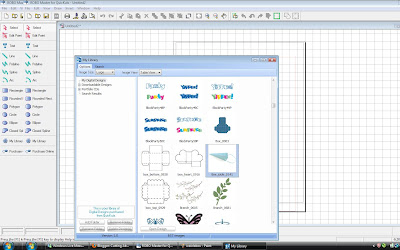
After the box shape has downloaded open your Robo Master library. Select the shape.

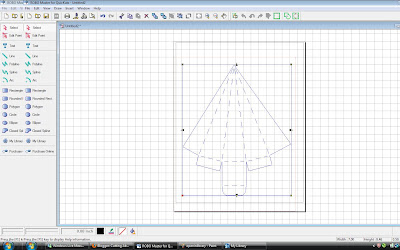
Place your image and be sure to stay within your cutting area.

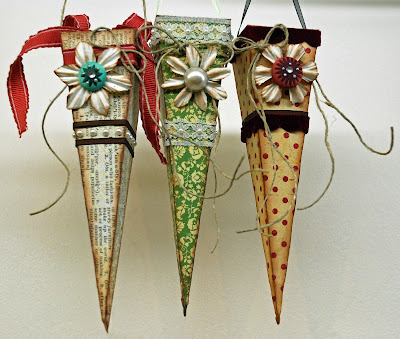
Press the cut button and click your way through the operation guide. When you image is done cutting, fold along dotted lines and glue on tabs. Punch holes in sides for ribbon strings and adorn according to taste.

Here is my example.


Share/Bookmark

Friday, November 20, 2009

Video Blog Hop!!

Hi!
It's me, BettyBee, and I am delighted to bring you the video that I made of my "quilted glass block" light, for the Cuttlebug Challenge Festival of Lights!

Glass blocks have been around for a little while now, but this is a fun way to incorporate fabric, vellum and a tag cut with Tags, Bags, Boxes and More.


I hope you enjoy the video, the blog hop, and check Cuttlebug Challenge to see what else is going on with this Festival of Lights Celebration!

Be sure to leave comments, because there are great prizes to be won!! We are giving away a Winter Woodland Cricut Cartridge!! Add our Blinkie to your blog, leave a comment, and you could be a winner!!

Happy Crafting ~
BettyBee
Share/Bookmark

Thursday, November 19, 2009

GYPSY - Wine Bottle Wrappers

Hello Everyone! Wow! Thanksgiving is only a week away! Are you ready? This is Tammy and I'm working on it and want to share a project that I made to use as favors for my Thanksgiving dinner guests!  We chose a local wine to serve at our Thanksgiving dinner and bought extra bottles to send home with our dinner guests as a way of saying, 'Thank You' for coming.  I didn't want to cover up the label on the bottles should they like it and want to purchase more in the future.  So, I came up with a wine bottle wrapper that ties onto the bottle with a beautiful ribbon and can be removed for consumption (like my big word? lol!) and to keep as a souvenir of the evening.   


I used the TAGS, BAGS, BOXES & MORE and WILD CARD cricut cartridges.  Using my GYPSY, I was able to re-size the tag to fit around my wine bottle perfectly and layer the frame and sentiment to fit.  I then cut them out with my cricut expression.  See the video below for step-by-step instructions on designing this project on the GYPSY.  You will learn how to (1) re-size images unporportionately, (2) use the new multiple page feature and (3) add an informational page to each of your projects in the GYPSY.


Click HERE if you cannot see the video above.

The WILD CARD cartridge has some awesome features and they can be used for more than just making cards!  Below is the HAPPY THANKSGIVING that I used and there are sentiments for almost every holiday and/or event you would encounter.


But my personal favorite feature of WILD CARD is the frames!  Love, love, love all the frame choices!  I couldn't pick just one, so I alternated these three...


Viola!  My wine bottle wrappers are now ready!


I also love using the wider ribbons and this one was perfect for my project.  Really adds a special touch to my place settings on my Thanksgiving dinner table.


Hope you liked my wine bottle wrappers, I know my dinner guests will!  I also hope that you have a wonderful and safe Thanksgiving Holiday!


Share/Bookmark

Monday, November 16, 2009

Print and Cut Option Using the Silhouette!

One of the great things the Silhouette can do is an option called "Print & Cut", it is a very versatile tool and makes creating very easy and simple.

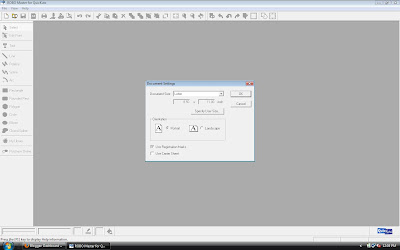
First and most important click on the new file icon, when you do this a menu window will pop up. Here there is a small checkbox that says "Use Registration Marks" go ahead and click this option and press ok.

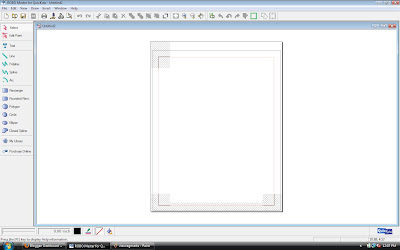
This opens up your image and you will notice some funny hash marks in each corner, these are your "Registration Marks"

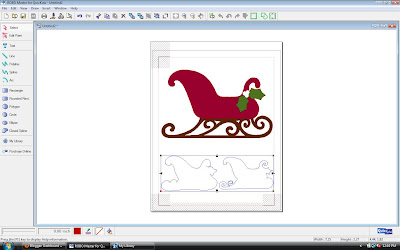
Open up your library and browse for images, next to your "Print & Cut" images there will be a little "P". When you've chosen your image click and press open. After you have placed your image you will notice an extra that was placed with it, click on the non colored image and press delete.

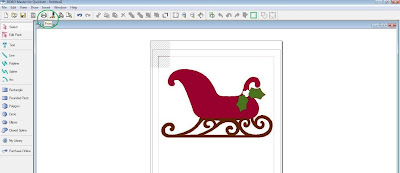
Next be sure your printer is hooked up to your computer. Load your cardstock or appropriate media into your printer. Go up to your Robo Master toolbar above and click on the small printer icon.

After your image has printed (Registration Marks and all) attach your media to your cutting mat and load into your Silhouette machine. Then in your software go up to the toolbar and press the "Cut" icon. Click ok to bypass the first pop up. Next choose your media from the drop down box.

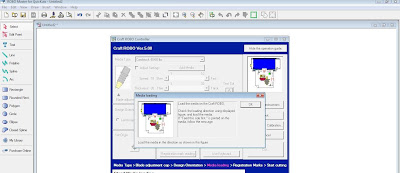
Go through the next few steps in the operation guide until you come upon the "Load Media" option, pay attention to which way to load your printed image by the extra pop up window, and press ok.

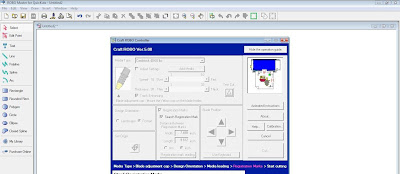
Your next option is the "Search Registration Marks" click the box next to this option.

Click next and hit the "Cut" button and your machine will search for the registration marks using a laser eye then will locate your image and start cutting an exact outline around your printed image. Perfect for Christmas cards and all sorts of other projects!!!
Share/Bookmark

Friday, November 13, 2009

Autumn is in the Air!


This is Joy and today's card is perfect for autumn! I used Making Memories Autumn Splendor papers, Club Scrap and Core'dinations cardstock, the Cuttlebug Victoria folder and the most fabulous Picturesque and Mini Monograms Cricut cartridges!

A little background on the Picturesque cartridge: Currently, it is only available in a bundled package that you can see by clicking HERE!

This card is an A2 card - 4 1/4"x 5 1/2",using green Core'dinations cardstock as a base. The first layer was cut 1/4" smaller on all sides (4" x 5 1/4") and then inked with chestnut roan Cats Eye chalk ink. I cut a section of red Club Scrap cardstock (from the Matrix kit) at 2 1/2" x 4" and then mounted a section of MM Autumn Splendor paper cut at 2 1/4" x 4". I tied a section of thin red striped ribbon around this (ribbon from Michaels).


Above, the bird (robin1) on the front of the card was cut at 1 1/2" using the regular cut, shadow and framework feature keys. The nest was cut at 1 1/4" using regular cut, shadow and framework feature keys. I cut the nest a little smaller as it looked better to me. I used a jeweled accent for the eye of the bird. The framework feature key adds a beautiful outline to the objects on Picturesque, as seen on the bird.


The nest was accented using the small Martha Stewart branch punch. It just adds a nice touch of texture. I punched those branches in two colors of brown cardstock.

The yellow scalloped circle was cut at 3" and run through the Cuttlebug using the Victoria folder to give it some more texture. A shadowed version of the scalloped circle was cut out at 3 1/4". Both of these circles can be found on the Mini Monograms Cricut cartridge. The circles were placed on the 3 1/2"x 3 3/4" paper that had been matted onto green Core'dinations cardstock. I then pop dotted that onto the background section.


No card is complete without finishing off the inside - especially when you use a darker cardstock as a base of the card. The inside lined paper is from Recollections and was inked with Cats Eye chalk ink. Then, a coordinating piece of Making Memories Autumn Splendor paper was placed on the left hand side. Finally, a sentiment stamp from Michaels, "Autumn is in the Air", was stamped with dark brown ink (Tim Holtz).


I hope you have a wonderful Thanksgiving! I am so grateful this year for my family and friends - people are what matter most!


Share/Bookmark

Wednesday, November 11, 2009

Thanksgiving Card ("hide selected contour" in Design Studio)


Hi, It's Diane from the Design Team and today I want to share a Thanksgiving card and explain a few things about using the "hide selected contour" option in Design Studio.  Maggie asked us to create some Thanksgiving items so I started looking through my cartridges on Design Studio for some turkey images.


I found turkeys on A Child's Year, Animal Kingdom, Doodlecharms, From My Kitchen (I think it is a drumstick), My Community, Paper Doll Dress Up and Stretch Your Imagination by using the search feature in Design Studio.  None of them appealed to me as I was designing so I decided to try something else.


I noticed the silhouetted stretched version of the leaf on Stretch Your Imagination and I decided it looked something like a turkey feather.  I decided to use these to create a "suggestion " of a turkey for my card.


Here is a preview of my design.  I added five "feathers".  The center feather is straight up and there are two on each side at 22.5 and 45 degree angles.  The two on the right are flipped so the tips point to the right side of the card.  The leaf skeleton/feather is cut into the card topper by using "hide selected contour" to hide the outline of each leaf cut.


The sentiment is from the Wild Card cartridge - this cartridge has so many useful sayings!

You will notice that there are multiple mats in the file - most of these are used to segregate items so you can change the preview colors and try different combinations.


The file will cut the card topper (5.25 x 4 inches) on page one.  The sentiment is set up to cut from a 2 x 4 inch piece of cardstock on the next to the last page (labeled CUT).


If you look at the preview on page one it will look strange.  In order to keep the outer contour of the leaf hidden when the files is closed and reopened I had to layer two sets of leaves and hide at least two lines on each set (there is a simple explanation of how to do this HERE).


You can cut this card topper from a six by six piece of card stock placed in the center of the mat (at the top if you are using an Expression).  The fine lines of the feathers are delicate so a mat that is not too sticky - but sticky enough to hold the paper firmly for the delicate cuts - is needed.


The card base is an 8.5 x 5.5 inch piece of cardstock folded in half for an A2 card.  I cut the sentiment from gold shimmer cardstock.  I also chose to use an extra piece of shimmer cardstock to highlight the feathers - you can experiment with different combinations. Cut this to 3 x 5 inches to fill the area behind the feathers.


Use a glue pen on the back of the card topper to make sure that the curls will be stuck down firmly.


Then you can adhere the liner piece to the topper and use a ATG gun or other adhesive to stick the topper to the card.  I inked the edges of the card topper to hide any white edges.


There is a low contrast in this version but the shimmer is very effective and the card is easy to read in real life.


Here are two of my trial cards side by side - the card on the right is easier to read at first glance.  You can experiment with contrast and values to see what effect you like the best.

The file is available to download from the link below - you will need Stretch Your Imagination and Wild Card to duplicate this card but if you don't have Wild Card you could substitute another font cartridge to create the sentiment (or change it to something else).

Thanksgiving Card

I hope you have fun trying out various combinations - let me know if you have any questions.


Share/Bookmark